iPhone screenshots for the App Store
Apple suggests formatting the screenshots for iPhone and iPad with a specific resolution, and, possibly, without the status bar. If you use XCode to take the screenshots you can find that they are not exactly that way, and they are stored in png format.
Updating the screenshots could be a boring task, so why don’t you write a script taking advantage of ImageMagick that automatically crop your images and convert them in jpg? In that way they will be ready to be posted on the App Store and on your web site.
We want to do the following steps:
- Crop the images to a specific width and height
- Convert them in jpg to reduce their weight
- Prepare some thumbnail for our web site
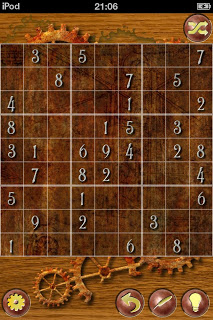
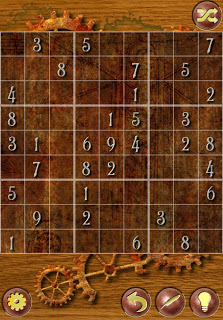
ImageMagick has several tools, we will just use mogrify. Our first goal is to cut the status bar. If you took the screenshot from an iPhone with the Retina Display, the bar will be 40 pixels tall. On the iPad will be 20 pixels tall. For example here there is a screenshot taken from our Sudoku:
The operation we want to apply is the “crop”. The original image’s size is 640x960 pixels on portrait Retina Displays (768x1024 on iPads). We want to take the area starting at 40 pixels from the top, with the size of 640x920 pixels. The way mogrify do this, is using the –crop flag:
mogrify –crop 640x920+0+40 imagename.png
If we want contextually convert the image to the jpeg format we can add the ‘-format’ flag
mogrify -format jpg –crop 640x920+0+40 imagename.png
What about the thumbnails creation? You just need to add another flag, ‘-thumbnail’ with the maximum thumbnail’s width and height
mogrify -format jpg –crop 640x920+0+40 -thumbnail 120x120 imagename.png
For more information you can check the ImageMagick Web Site (www.imagemagick.org), or take a look at their books.
Here is the complete bash script. It assumes that you called the screenshots with the names: screenshot_iphone_n.png and screenshot_ipad_n.png (where n is the picture number, e.g., screenshot_iphone_1.png, screenshot_iphone_2.png, …), and it stores the thumbnails in a subdirectory.
#!/bin/sh

# Installation directory of ImageMagick (if not in PATH)
IMDIR='/ImageMagick-6.6.7/bin'
# Crop flag for iPhone with Retina Display
CROP='-crop 640x920+0+40'
# Crop flag for iPad
CROPIPAD='-crop 768x1004+0+20'
# Thumbnails directory
THUMBSDIR=thumbs
# Thumbnail flag
THUMB='-thumbnail 120x120'

# Adjust the screenshots
$IMDIR/mogrify -verbose -format jpg $CROP screenshot_iphone*.png
$IMDIR/mogrify -verbose -format jpg $CROPIPAD screenshot_ipad*.png

# Make the thumbnails
mkdir $THUMBSDIR
$IMDIR/mogrify -format jpg $CROP -path $THUMBSDIR $THUMB screenshot_iphone*.png
$IMDIR/mogrify -format jpg $CROPIPAD -path $THUMBSDIR $THUMB screenshot_ipad*.png